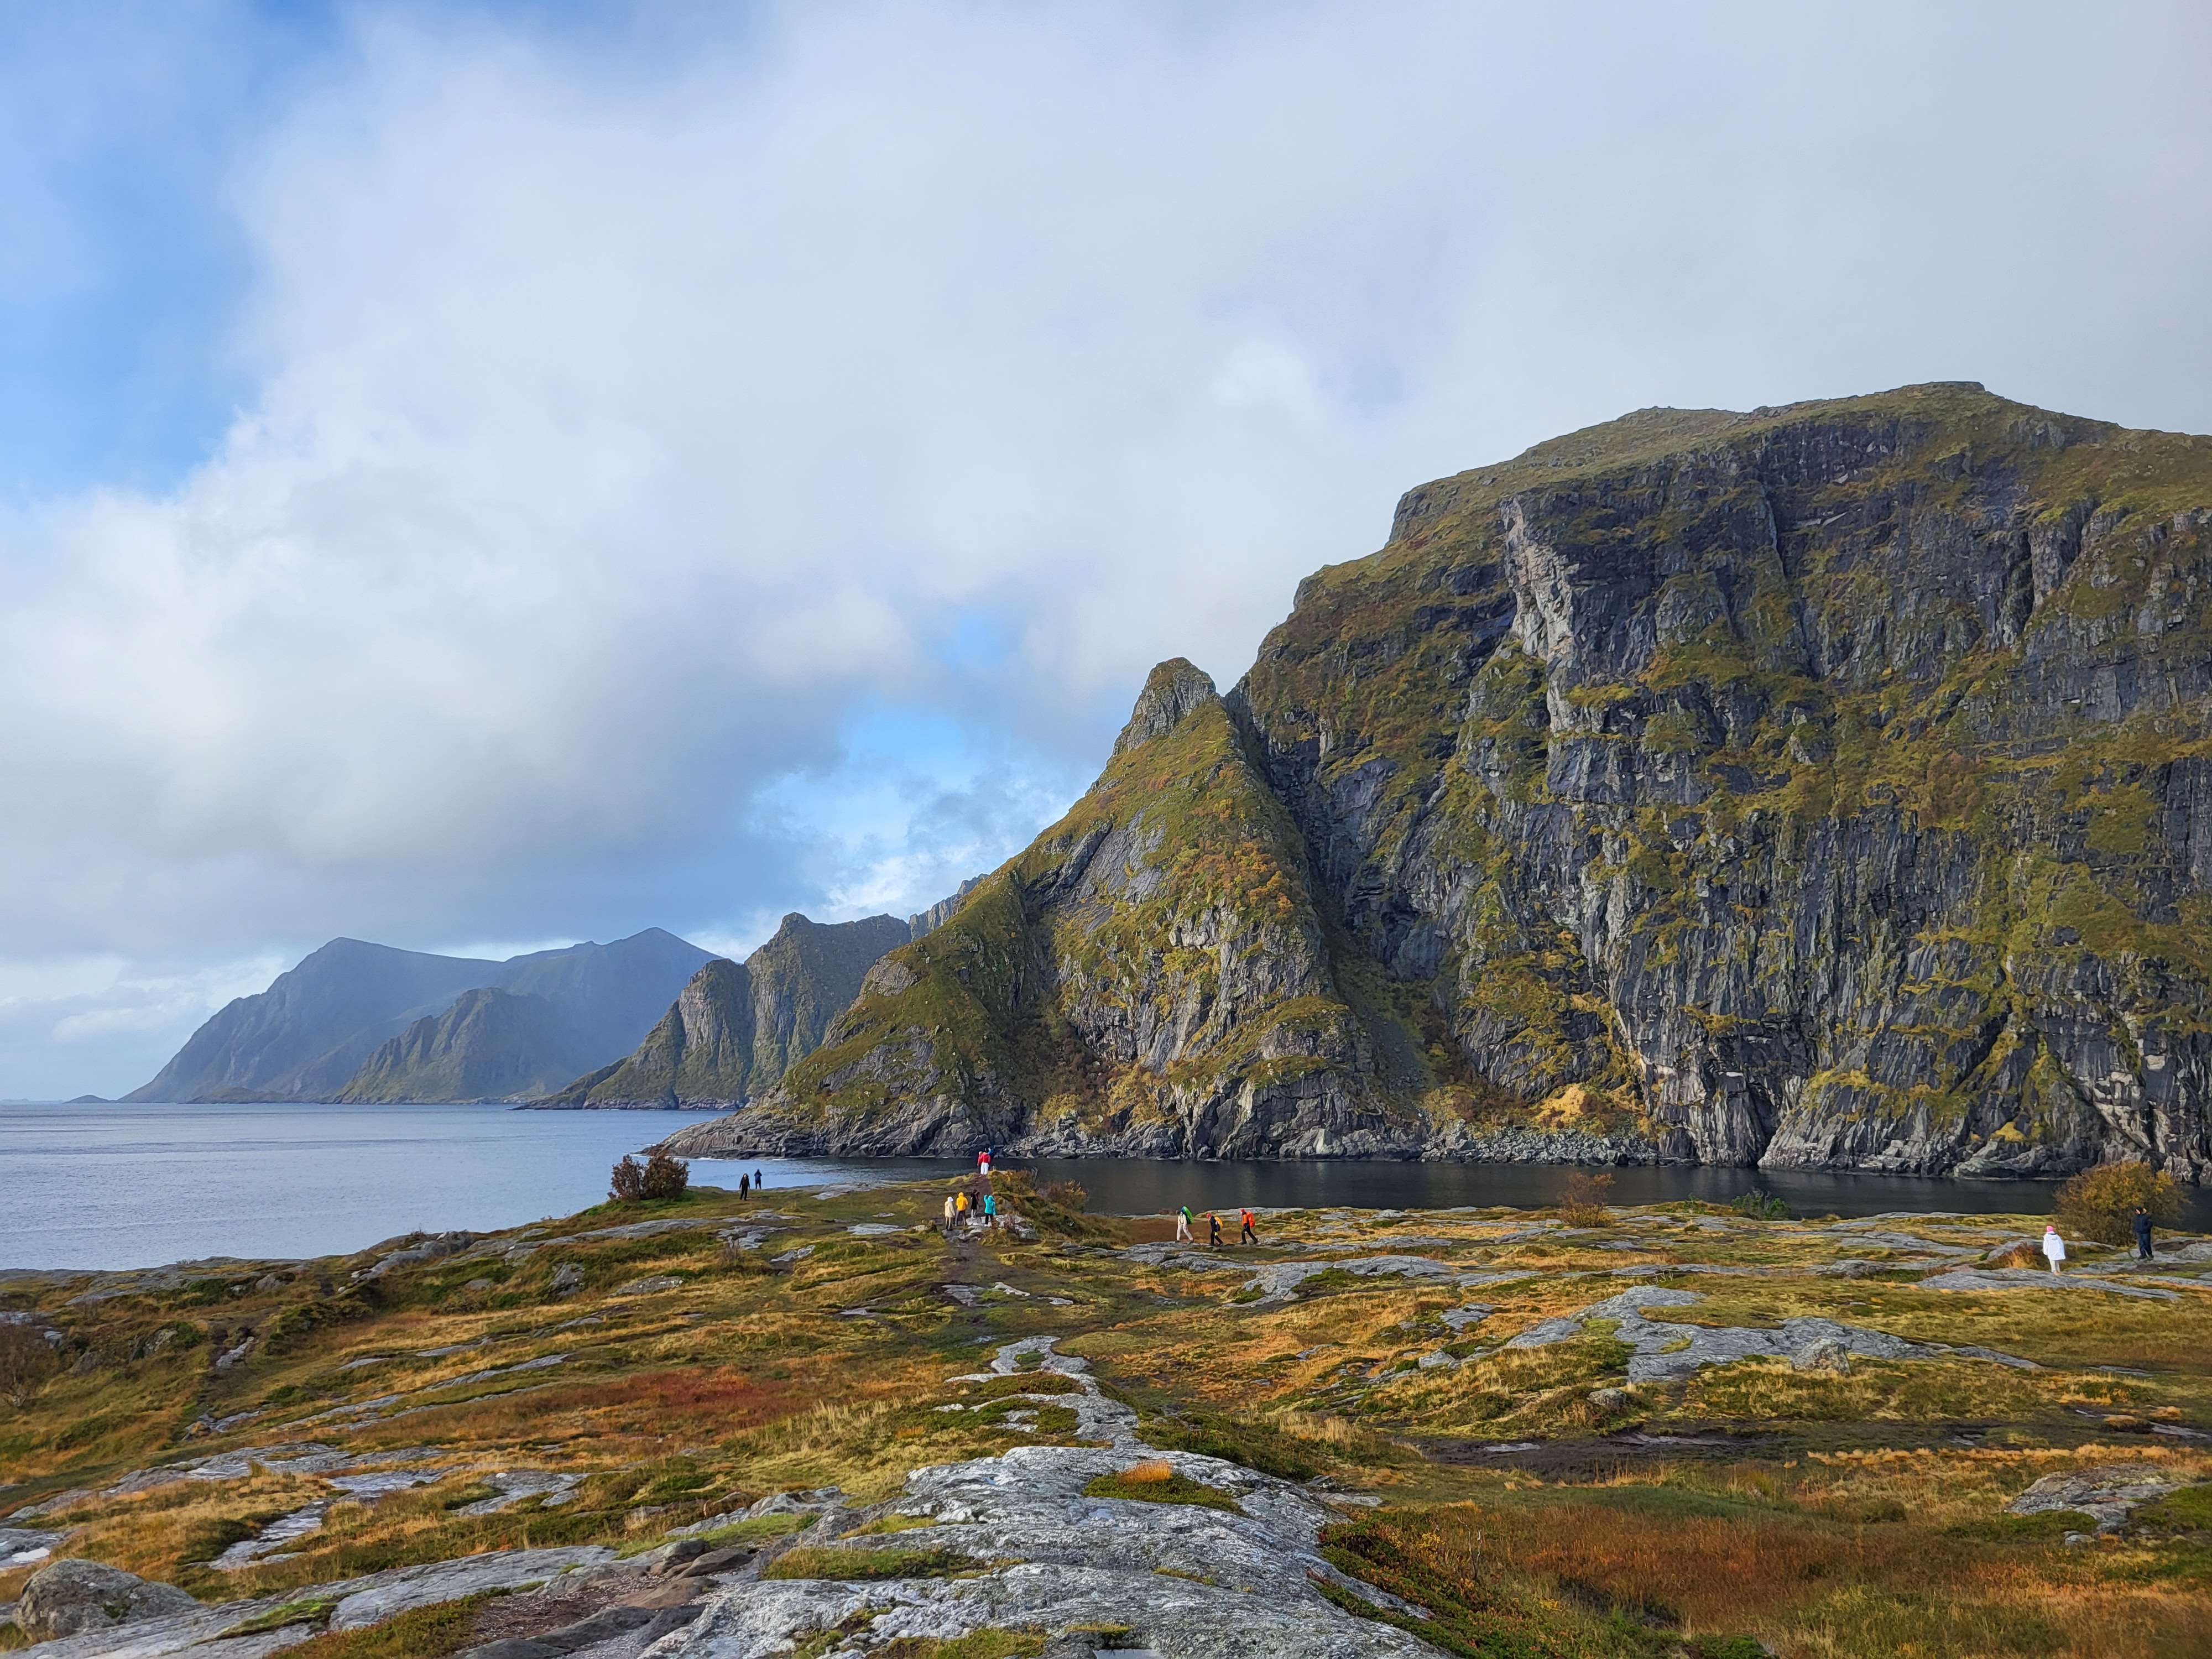
In September and October 2024, we spent nearly 4 weeks travelling to, in and back from Norway with our Kia EV6. Our itinerary is available below, which includes stops in Billund, Denmark to visit Legoland, the fjords and Lofoten in Norway and a trip back to Belgium on a cargo ship. Hope this helps your own planning!
First a quick overview of our trip:

Day by day
Day 1: Drive from Belgium to Bremen, Germany
This first day, we decided to embark on our trip a little earlier than initially planned just to make our arrival in Billund a bit more comfortable. Normally it would take us about 11 hours (including charging breaks) to drive from our home to Billund, but we decided to make a stop in Bremen, Germany to split the long drive in two. Since we both still had to work that day we left in the late afternoon, had some dinner along the way during a charging stop and arrived in Bremen around 10.30 PM.
Day 2: Arrival in Billund, Denmark
The following morning we had some breakfast at the hotel and headed for Billund around 10 AM. After two short charging stops along the way, we arrived at Hotel Legoland around 2.30 PM where we spent two nights.
Tickets to visit Legoland (which is located right next to the hotel) can be bought at the reception or online in advance but make sure to check out the offers and packages that Legoland itself offers! You might find a combination that suits your needs.
EV charging is also possible at the hotel parking, but beware that the charging time is limited and you’ll have to move your car after a while.
Later in the afternoon, we visited Mini-Chef: https://legohouse.com/en-gb/explore/eateries. It’s not required to make a reservation but if you want to visit, it’s best to book your table in advance just to be sure! It can get quite busy on certain moments.


Day 3: Visiting Legoland
The day of our visit to Legoland! At first we didn’t think we’d spend so much time there as two adults, but in the end we spent about 6 hours there! Wonderful place with an aquarium, different rides, shops, Miniland and so much more.


Day 4: Ferry to Norway
From Legoland, we drove about 3 hours (including a short charging stop) to Hirtshals to catch our ferry which left at 12.15 PM. We had booked a Colorline ferry which cost 139 EUR for 2 adults and 1 vehicle.
The ferry arrived in Kristiansand in Norway around 3.30 PM. We had booked an Airbnb in Sandnes for two nights which was about a 3,5-hour drive from Kristiansand (including a charging and dinner stop), no ferry along the way.


Day 5: Visiting Stavanger
Today we visited the city of Stavanger, which is about a 20 minute drive from Sandnes. Here we visited the Sverd i Fjell (Swords in Rock) monument (which has its own parking) and after parking here next, we visited the Museum of Archaeology, Gamle and Holmegate.


Day 6: Kjeragbolten hike
Today we planned the Kjeragbolten hike. The weather didn’t look too great at the start, but since we saw it was starting to clear up, we decided to go for it. If it’s raining hard and doesn’t seem like it’ll clear up, best not to attempt this hike at all. There were a LOT of slippery rocks and it’s easy to get lost up there if you cannot easily find the hike markings in bad weather. The hike took us about 5,5 hours which includes our breaks. More info on the hike below the pictures.
Parking for the hike is available at the following location: https://maps.app.goo.gl/atw8LpyEA2LxpwQW6 which costs 300 NOK and has toilets available.
Driving from our Airbnb in Sandnes to the Kjerag parking took us about 2 hours, no ferry.
After the hike, we drove down to Lysebotn Camping (no reservation needed) which took about 15 minutes (no ferry) and spent the night there in our tent with an amazing view.


Kjeragbolten
Source: https://www.earthtrekkers.com/kjeragbolten-hike-complete-guide:
- Distance: 12 km (7.5 miles) out-and-back
- Elevation Gain: 570 meters
- Difficulty: Strenuous
- Length of Time: 6 to 8 hours
More info: https://www.visitnorway.com/places-to-go/fjord-norway/ryfylke/the-lysefjord-area/hiking-to-kjerag
Day 7: Preikestolen hike
Now it was time to head to Preikestolen. We left the camping around 9 AM and first drove for nearly 2 hours to Lauvvik where we took the ferry for about 15 minutes. Payment was done on the ferry with our credit card.
We first drove to Preikestolen Camping to already set up our tent and have a small lunch. You can’t book a spot in advance so during high season they advise people to arrive by 11 AM (check-out time) to be able to secure a spot. We arrived around noon in mid-September and had a LOT of open spots to choose from.
From there it was just a 5 minute drive to the Preikestolen hike parking lot (which has a bathroom). The Preikestolen hike itself took us around 4 hours roundtrip for 8,8 kilometers, including breaks and enjoying the views.
The hike can be very steep (and rocky) in some sections, so make sure to wear decent hiking shoes with sufficient grip. The elevation info from my Strava says it all:


Day 8: Drive to Odda
After leaving Preikestolen Camping in the morning, we first headed down to Songesand Kai for a view over the fjord from down below and fly with our drone a bit. From there we headed to Ropeid (on the way there’s your chance to visit Apal Sideri if you want!). On the way you’ll probably have to take the Hjelmeland-Nesvik/Rv13 ferry which lasts 13 minutes and you can pay with your Autopass (explained further below in the general info section).
From Ropeid we followed the 520 scenic route (the Ryfylke National Tourist Route) and then onto the E134 towards our camping.
During the day, we stopped at multiple view points and waterfalls such as Staudamm, Svandalsfossen and Låtefossen.
We stayed at Eikhamrane camping for two nights in a cabin. The cabin wasn’t really great. The door didn’t match the frame so there was a big gap which we had to stuff with our towels to keep too much cold from getting in. It seems like a lovely camping when staying there with a tent or camper, but I’d avoid the cabins until they’ve been renewed.
In the evening we had dinner at Ferskvaren in Odda. Recommended! Loved the food and friendly staff.


Day 9: Bondhusvatnet & Mosevatnet
Visited Bondhusvatnet today, more info can be found in the following blog post:
After Bondhusvatnet we drove to Mosevatnet parking (not really a lot of room to park there though but the drive up is an adventure in itself) for a view on the glacier and its lake. It was veeeery cold but it’s a beautiful drive and the views are wonderful.
Had dinner again at Ferskvaren.


Day 10: Borgund Stave Church & drive to Luster
Headed to Luster today. We followed the following route: https://maps.app.goo.gl/st6sjnNWrxW6L33N7 (might not be calculated entirely correct during winter time when some roads might be closed but the waypoints should give you an idea). This route will pass by (parts of) the Hardanger National Tourist Route and the Aurlandsfjellet National Tourist Route.
Two ferries to be taken along the route: Jondal – Tørvikbygd and Fodnes-Mannheller (both can be paid with Autopass).
Along the way we stopped by some view points again, such as Skjervefossen (with beautiful toilets) and Stegastein. We also visited the Borgund Stave Church. If you want to see the church from the inside, you’ll have to purchase tickets first at the visitor centre nearby. If you just want to see it from outside the fences, you don’t need tickets. We bought tickets and would do so again in the future. It’s wonderful seeing it from up close.
We spent the night in a cabin at Dalsøren Camping. They have a private sauna with a view on the fjord and 3 EV charging stations.


Day 11: Geiranger fjord & ferry
We planned the Geiranger ferry today so our route was the following: https://maps.app.goo.gl/riRVM2oGZvBzTWSm7 (again, might not be entirely accurate during the winter). This route passes by the The Old Strynefjell National Tourist Route and the Sognefjellet National Tourist Route.
Our entire route, including our arrival at the next camping, looked like this:

The Geiranger ferry needs to be booked in advance! The ferry ride takes 1 hour and we took it from Hellesylt to Geiranger.
We spent the night at Dalen Gaard camping in a cabin.


Day 12: Driving the Atlantic Road
The Geiranger – Trollstigen National Tourist Route was closed during our trip because of falling rocks but make sure to check out whether you’re able to drive it since it provides such a famous and amazing view!
We were able to do a part of the Atlantic Road, see our route: https://maps.app.goo.gl/YyUKvWbvXAUkAXAZ9.
Rampestreken is another famous view point to check out when you have some time. We skipped it due to the already long day.
3 ferries to be taken today:
All can be paid with your Autopass toll badge.
Had dinner at Amore Orkanger and spent the night at Bårdshaug Herregård where we were also able to charge our car during the night.


Day 13: Drive to Mosjøen
Today we drove to Mosjøen, no ferries involved this time.
Had dinner at Venezia Pizza og Grill (food and service was great!) and spent the night at Mosjøen Romutleie which was fine for 1 night and perfectly located for our drive to Lofoten.

Day 14: Arctic Circle Centre
Drove to the Arctic Circle Centre today which was about a 2 hour drive from Mosjøen. We stayed there for around 45 minutes taking a walk around the centre, watching a short film about the arctic circle and buying some stuff in the souvenir shop.
Driving to our stop for the night (Arctic Cabins) took us 1 hour and 15 minutes from the centre.
We stopped at the Nordland National Park Center to charge our vehicle and took a walk of about 1 hour to and back from Junkerdalsura. The walk was quite easy and very peaceful in those beautiful surroundings! Pictures below.
No ferries taken today.


Day 15: Ferry to Lofoten
Nothing special planned today except for heading over to Lofoten! We drove around 1 hour and 15 minutes to the ferry terminal in Bodø. The ferry from Bodø to Lofoten can be booked in advance if you want to be sure of a spot! More info is available here:
Booking the tickets is done on this website but the above site also has the link available. If you’re very early, you can park your car in the correct ferry lane and head out a bit but make sure to be back in time before boarding starts! For us that was 1 hour 20 minutes before departure and we were the first to arrive (and thus park) at the terminal.
It took the ferry around 2,5 hours to reach Lofoten in Moskenes from Bodø.
We stayed at May’s Apartments in Reine for two nights. Slept great, was able to do some washing and it’s well located for some trips on the islands with also a Circle K at walking distance to buy some groceries.


Day 16: Visiting view points at Lofoten
Drove around a bit to some view points (no ferries) and did some short walks. Visited the “Utsiktspunkt Å” for which parking is available here. Also headed to The bakery at Å which has delicious pastries although a bit expensive. Would have taken a picture of our purchase but we finished it too quickly. 🤭
Some other options to do in the surroundings:
Note that some of the pictures below were taken with our drone.


Day 17: Kvalvika Beach Trail hike
After a calm day yesterday and some good night’s sleep, we were ready for another hike! More info on our Kvalvika Beach hike can be found here:
After the hike, we drove (no ferries) to our next sleeping spot. The owner was very friendly and helpful! You have your own parking spot, private entrance and your own entire floor in the house.
Went for some snacks and drinks at Sjokoladerommet. Very cosy place with delicious food!


Day 18: Visiting the Lofotr Vikingmuseum
Visited the Lofotr Vikingmuseum today. Very fun to do! There’s a building built like a viking longhouse where people are showcasing the making, use and maintenance of old tools, clothing, etc. Very interesting! You can also head down to the water which is about a 20 minute walk and visit a reconstructed viking boat. We saw quite a few spots which probably host lots more activities during high season.
Some other options to do when you’re nearby:
We spent two nights at Hotel Sortland where they also have EV charging available.


Day 19: Visiting Andenes
The weather was not really great today so instead of doing a hike, we decided to head to Andenes and take a look around. With better weather, you can do a whale watching trip from there.
Other option to do:


Day 20: Drive to Junkerdal
Left Lofoten today and took the Lødingen-Bognes ferry which takes about an hour and can be paid with your Autopass toll badge.
After another 3,5 hours of driving, we arrived in Junkerdal to spend the night there.


Day 21: Drive to Majavatn through Sweden
Headed down to Majavatn and decided to take a small drive through Sweden on the way, because why not:

Stayed at an Airbnb in Grane (right above Majavatn).


Day 22: Drive to Trondheim
Again didn’t plan much today, just headed down further, this time towards Trondheim and stayed at an Airbnb again where we were able to charge our car.
Took a walk around Trondheim in the evening and had dinner at Graffi Grill Midtbyen which we found delicious!


Day 23: Magnificent spots on the way to Aurdal
On our way down to Aurdal (no ferries), we were able to do parts of the Valdresflye National Tourist Route and the Rondane National Tourist Route by following this route:

We also visited a few spots:
- Mågålaupet was beautiful but beware when it rained/rains, the rocks can be slippery!
- Short stop at Sohlbergplassen view point.
- We also stopped at Stuttgongfossen which is a gorgeous location and definitely worth visiting! Parking wasn’t clear at that time so we just parked alongside the road somewhere.
- Also stopped here along the way for a dip in the freezing water (not me though, my husband).
- A bit of a longer stop at Steinplassen to enjoy the views of all the snow.
Spent two nights at Aurdal Fjordcamping & Hytter which we definitely recommend! Had a lovely time there. Very friendly staff, they have their own restaurant, a sauna, recently renovated kitchen area, toilets and showers, and everything was very clean!


Day 24: Jettegrytene ved Kvitingen hike
Headed to Jettegrytene ved Kvitingen today for a hike. Parking is available here. The parking lot is located on some sort of toll road (even though it’s a basic mountain road). There’s a barrier on the road where you can pay the toll with your credit card. Was 100 NOK if I remember correctly. To make it to the potholes you’ll have to climb your way up over rocks a bit so make sure to wear sturdy hiking shoes. In the end the hike took us about an hour and a half for 5,44 kilometers, but it really depends on how far you’d like to go around the lake, we didn’t go too far.


Day 25: Visit to the Kistefos-Museet
Today we visited the Kistefos-Museet for a bit. Was a fun stop to do, were there for around an hour and were able to charge our car there. I wouldn’t immediately go out of my way next time to visit but it was worthwhile since we didn’t have anything else planned that day and it was pretty chill.
Then we simply drove further down to our next stop for the night in Larvik, no ferries involved today.
Had dinner at Bedehuset in Larvik. Was great, especially the dessert!


Day 26: Hop on board the cargo ship
For the next two nights, we booked a stay on a cargo ship constantly moving between Brevik (Norway), Göteborg (Sweden) and Ghent (Belgium). No phone service available on the way, so it was a great break from our busy holiday! We had booked it through CptnZeppos. They took care of everything for us and after comparing prices, it doesn’t seem to cost (a lot) more than when booking the trip yourself. Not too shabby, very happy with their service!
We arrived around 7 AM at the freight terminal in Brevik. We drove up to the gate where the trucks also enter and some people came to fetch us and showed us where to park on the cargo ship.
Food was served three times during the day: breakfast, lunch and dinner, and we even got a snack in the afternoon!


Day 27: Full day on the cargo ship
Got a free tour of the bridge today which was great and very interesting!


Day 28: Arrival back in Belgium
We arrived in Ghent at around 5 AM. They woke us up in time by calling our room but we were already awake anyway. Travelling on the cargo ship was a wonderful experience with very nice people, would definitely do it again! The peace and quiet of the trip was a perfect ending to our amazing holiday in Norway.
General info and sources
EV charging
There are so many EVs already driving around in Norway, we had no issue at all finding charging stations. Most of them we found and paid with our Chargemap app and pass. We also installed the Mer Connect and Bilkraft apps, just to have additional coverage and we used both a few times as well. The Mer Connect app can be found here for Androids or here for iPhones, and the Bilkraft app here for Androids and here for iPhones. Next to that we also used our credit card a few times but not a lot.
We didn’t need it but I read somewhere that the Clever app is great for charging in Denmark.
Some sources:
- https://www.anwb.nl/auto/elektrisch-rijden/vakantie/met-een-elektrische-auto-naar-noorwegen (Dutch website)
- https://elbil.no/ev-tourist-guide-to-norway
- https://www.ladestasjoner.no/kart
- ABRP
Ferry and ship to and from Norway
Heading to Norway
As mentioned above, we took the ferry from Hirtshals in Denmark to Kristiansand in Norway through https://www.colorline.com. This cost us 139 EUR for 2 adults and 1 vehicle. We didn’t book any seating in advance which was fine for us. Just sat in the cafeteria area a bit. The ferry ride itself took around 3 hours.
Coming from back Norway
We made our way back to Belgium aboard a cargo ship of DFDS. Booked the trip through the Cptn Zeppos website. The cargo ship headed from Brevik in Norway to Ghent in Belgium and made a stop in Göteborg, Sweden on the way back.
Departure was on a Sunday around 9 AM and arrival back in Belgium was on Tuesday early in the morning.
Our standard Belgian ID was plenty for Norway but for the cargo ship, we needed our international passports.
Toll in Norway
Sources:
- https://www.anwb.nl/vakantie/noorwegen/reisvoorbereiding/tol (Dutch website)
- https://www.heartmybackpack.com/norway/plan-road-trip-norway
- https://ferde.no/en/invoice/how-to-pay-toll-in-norway
Except for the toll road mentioned on day 24 of our trip, we didn’t encounter any physical toll gates. There are quite a few toll roads in Norway but you can just keep driving, your license plate and/or toll badge will be scanned and payment will be handled depending on which option you chose (see below).
There are three options to pay for the toll:
Cheapest option: toll badge
A toll badge can be requested at https://flytpass.no/en which we used. These can be put on the inside at the top of the windshield of your vehicle and will be scanned when driving on a toll road and even to pay on most ferries in Norway!
With the Flyt toll badge you enter what they call an “Autopass agreement”. Anywhere where you can pay with Autopass, you can enter / drive with this toll badge. It’s the cheapest option since the toll badge providers provide a lot of discounts. Flyt also processed the discounts automatically but beware that not all badge providers do this so there might be more admin later with other providers.
It’s also possible to get an even higher discount on your ferry ride if you register for a prepayment agreement here. We didn’t register for that discount because we didn’t know in advance how much everything would cost us so we found a prepayment a bit difficult to estimate. In the end we spent around 58 EUR during our entire trip on toll payments with Autopass.
With a toll badge you can follow the “Autopass” signs on the roads and at the ferry terminal if necessary, then your badge gets scanned automatically.
Don’t forget to order your toll badge plenty in advance! Ours was stuck at customs for quite a while and it took around a month for it to arrive at our home.
Every few weeks we would get a paper overview of our toll costs at home with the necessary information to make the payment. An overview of locations where your vehicle was scanned is also available in the self-service section of the Flyt website so you can check fairly easily whether your toll badge is being scanned successfully.
Ferry prices are also available here: https://autopassferje.no/en/prices.
Register on Epass24
You can create an account in advance on the Epass24 website. With an Epass24 account you will also be able to follow up on the locations where your vehicle has been scanned and payment can be handled through them.
The downside here is that an Epass24 account doesn’t provide you with discounts, while a toll badge does.
Just drive (no registration in advance)
This is the most expensive option. By registering your vehicle in an Epass24 account, you at least make sure that the correct toll rate is applied for your vehicle. Especially interesting for EVs since EVs are charged way less than most other vehicles! By not registering, it’s not certain that the correct rate will be applied.
You can still drive around in Norway, nobody will stop you. Your license plate will still be scanned and you (or at least the owner of the vehicle) will receive the necessary invoices at home (this might take quite a few months though).
Parking
There were quite a few parking locations available where we didn’t need to pay for parking, but the ones we did need to pay, we were able to with the EasyPark app. We also had the Parklink app installed but didn’t need it in the end. Can’t hurt to have it as back-up though! Don’t forget to set them up in advance so you don’t waste time trying to set everything up when you need it.
Trolltunga hike
We decided to not do the Trolltunga hike during this trip since it would’ve taken quite the time (and effort after the Kjeragbolten and Preikestolen hikes) out of our trip but we wrote down some information and sources that I can share here.
Sources:
- https://en.visitbergen.com/things-to-do/trolltunga
- https://www.trolltunganorway.com/en_GB/activity/267450/trolltunga-parking-p3-at-maagelitopp-upper-starting-point
- https://trolltunga.com/parking-and-transportation/parking
Trolltunga tour: 8-12 hours from P2 or 7-10 hours from P3.
You need to be in good shape to do this hike. You have to allow plenty of time, because it is a long and demanding walk that will take you between 7 – 12 hours there and back. (4-6 hours each direction)
If you start the hike at the parking lot P2 in Skjeggedal, you can calculate a total of 8-12 hours. From here the trip is about 27 km. You can also start from P3 Måglitopp. From there the trip is 20 km and about 7-10 hours. There is a shuttle bus between Odda, P1 Tyssedal and P2 Skjeggedal and another bus to P3 Måglitopp.
The height difference from P2 Skjeggedal to Trolltunga is about 800 meters and from P3 Måglitopp about 320 meters.
P3 Mågelitopp Parking (upper parking): NOK 600 per day (until midnight same date) per vehicle.
If you are doing the hike without a guide, it is only possible from mid June to mid September.
Camping
Source: https://www.lifeinnorway.net/camping-in-norway/:
The right to roam law allows you full access to public land provided you are respectful to nature and leave no trace behind. In addition, there are two specific rules international visitors should be aware of.
You must stay at least 150 metres away from private property, such as inhabited houses, cabins or private campgrounds. You can also not stay in the same place for more than one night.
Other important guidelines to check are whether you can build a fire in the specific area you choose.
We ended up just staying at specific camping grounds when we wanted to sleep in our tent so we didn’t camp in the wild in Norway.
Other sources used
- Lofoten info: https://visitlofoten.com/en/topic/essential-travel-tips-to-lofoten/
- Drone info: https://visitlofoten.com/en/droneguide/
- National Tourist Routes: https://www.nasjonaleturistveger.no/en/routes
- National Tourist Routes in Lofoten: https://visitlofoten.com/en/national-scenic-route-lofoten/
Trip highlights
- Kjeragbolten hike
- Preikestolen hike
- Bondhusvatnet hike
- Kvalvika Beach Trail hike
- Lysebotn camping
- Aurdal Fjordcamping & Hytter
- Gamle Strynefjellsvegen national route






Leave a Reply